September doesn't have to mark the end of the cycling season. Rather, it's a time when your bike needs a different kind of attention: less polishing before a weekend ride, more inspection of parts exposed to water, sand, and rapidly changing temperatures. The guide below shows you how to perform a sensible self-service, where not to improvise, and what small equipment truly makes autumn riding easier.
Table of Contents
Why autumn bike service differs from summer service
In summer, dust can be visible but usually remains dry. In autumn, sand particles mix with water to form a paste that works its way between chain rollers, cassette cogs, brake pads and rims, or near seals. Add to this wet leaves, cooler mornings, and more frequent rides after dark. The point isn't to dismantle your bike after every ride. A short routine is more effective: remove fresh dirt, dry the drivetrain, listen for changes in sound, and react before a small problem turns into a costly repair.
The answer to how to prepare your bike for autumn also depends on your riding style. City bikes suffer from water thrown up by wheels, curbs, and being left outdoors. Gravel bikes pick up fine gravel that can get into the bottom bracket area and derailleur pulleys. MTBs require more frequent inspection of brake pads, suspension stanchions, and play after muddy rides. Road bikes with narrow tires are more affected by incorrect pressure and contaminated surfaces. A single checklist can cover all these bikes, but priorities will differ.
The most important rule is: service begins with observation, not tightening. Listen to your bike during a quiet ride on an empty stretch. Check if the drivetrain runs quieter on some gears and louder on others, if the wheel isn't rubbing periodically, and if the brake lever isn't coming closer to the handlebar than usual. Note down any symptoms before washing, as water and grease can temporarily mask them. If you see a crack in the frame, a loose hub, a hydraulic brake leak, or a deep tire cut, postpone your ride and visit a service shop.
Diagnosis before cleaning: five minutes that save work
Position your bike stably and start by inspecting the frame in good light. Look for cracks, chips exposing metal, loose cables, and areas where bags or cables rub against the paint. Run your hand over the tires, but first remove any glass with a stick or tweezers, not your finger. Spin both wheels. Lateral runout, noticeable play in the hub, or rubbing require further diagnosis. Press down on the bike from above and listen for any creaking coming from the cockpit, saddle, or pedals.
Next, check connections that genuinely impact safety: wheel axles, seat post clamp, stem, handlebars, levers, and mudguard mounts. Don't tighten every screw "just in case." Excessive torque can damage threads, clamps, or carbon fiber components. Manufacturers provide torque values, usually on the component itself or in the manual. For working with components requiring specific torque, a ROCKBROS 2–24 Nm torque wrench is useful: its purpose is to control force, not to replace manufacturer documentation.
Perform brake tests separately for the front and rear. Standing next to the bike, squeeze one lever and try to push the bike. The wheel should stop effectively, and the lever should not bottom out against the grip. Then, inspect the thickness of the pads and the surface of the rotor or rim. A greasy shine, uneven wear, or a metallic sound are warning signs. The Polish Police remind that a bicycle used in traffic must have at least one working brake; practically, two working systems provide greater control on slippery surfaces.
Finally, measure the tire pressure with a gauge and record the result. Assessing by squeezing the tire with your hand is very inaccurate, especially with wider tires. The starting point is the range indicated on the side of the tire and the rim manufacturer's recommendations; then consider rider weight with luggage, tire width, type of surface, and whether it's a tube or tubeless system. If the pressure drops significantly overnight, first look for a leak. Simply pumping up before each ride can hide a embedded wire, damaged rim tape, or a valve issue.
Washing and drying: a clean bike without washing out grease
Prepare two buckets or at least two separate cloths: one for the drivetrain, the other for the frame and cockpit. Also, a soft brush, a smaller brush, a mild cleaning agent, a towel, and a chain degreaser. Separating tools prevents transferring greasy dirt to brake rotors. Remove water bottles, lights, pump, and bags. If you are washing an e-bike, follow the manufacturer's instructions, turn off the power, and do not direct water at connectors, the display, or the battery area.
Start by gently wetting to soften mud. Do not use a strong stream near hubs, bottom bracket, headset, pedals, suspension stanchions, and seals. Wash from top to bottom: handlebars, top tube, fork, wheels, and finally the dirtiest bottom of the frame. Brush without scrubbing sand particles across the paint. KROSS, in their autumn-winter season guide, also warns against pressure washers, as water can get to places where a layer of grease should remain.
Clean the cassette and derailleur pulleys with a tool exclusively for the drivetrain. Apply degreaser carefully, preferably to a cloth or brush, to avoid spraying it onto the rotor and pads. Rotate the crank backward, collecting dirt from each side of the chain. If using wax, adhere to the procedure recommended for the specific product; mixing accidental oil with a waxed chain negates the system's benefits. After washing, rinse with a small amount of clean water and thoroughly wipe the bike dry.
Drying is not just cosmetic. Water left in screw heads, chain links, and near clamps accelerates corrosion and binds the next batch of dust. Spin the wheels a few times, gently bounce the tires off the ground, and use a dry cloth. Do not direct hot air at seals or paint. Store the bike in a well-ventilated, dry place, not in a sealed cover immediately after a wet ride. A cover protects against dust, but on a wet bike, it can trap moisture instead of helping.
Drivetrain in autumn: when to clean, what to lubricate with, and how to assess wear
The chain should be clean inside the rollers, not just shiny on the outside. After drying, apply a small drop of lubricant to each link on the roller side, rotating the crank backward. Wait as long as the product manufacturer recommends, then wipe the outer plates almost dry. The lubricant should work in the joints; excess on the surface catches sand and forms a black paste. In damp conditions, wet lube usually lasts longer but especially requires careful wiping.
Frequency depends on conditions, not the calendar. After a wet, muddy ride, inspect and dry the drivetrain immediately. After dry commutes, it's enough to react to increasing rustling, visible dirt, or the recommended mileage of a given product. Lubricating a dirty chain is not servicing: it pushes contaminants deeper. On the other hand, aggressive degreasing after every short ride is time-consuming and may be unnecessary. A practical rhythm is a quick wipe after moisture and a more thorough cleaning when the cloth still picks up gritty residue after a few rotations.
Check wear with a chain checker, and choose the replacement threshold based on the number of gears and the drivetrain manufacturer's recommendations. Do not base your decision solely on a single internet value, as different systems tolerate different amounts of elongation. If a new chain skips on an old cassette, the cogs may have worn along with the previous chain. A hooked tooth, skipping under load, or a stiff link require a more thorough inspection. Early chain replacement can be cheaper than simultaneous replacement of the chain, cassette, and chainring.
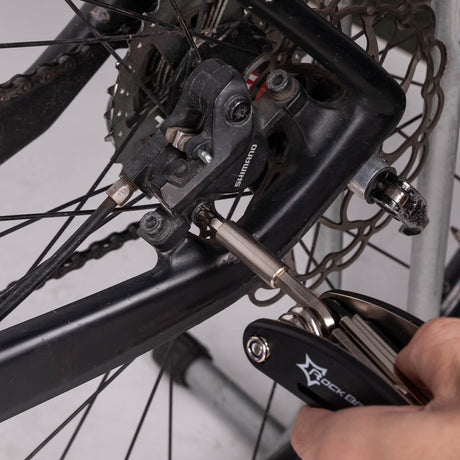
After cleaning, go through all gears on the stand, but perform the final test on a quiet road under light load. Delayed shifting can be caused by a dirty cable, a bent hanger, incorrect tension, or wear, not just limit screw adjustment. Do not turn them without understanding their function. For minor adjustments and restoring saddle or lever position on the go, a compact tool is sufficient. ROCKBROS 16-in-1 multitool has common Allen keys and screwdrivers, but before purchasing, compare the tips with the specific screws on your bike.
Brakes, wheels, and tires: checking grip instead of guessing
Disc and rim brakes
With disc brakes, do not touch the braking surface with your fingers. Clean discs with a clean cloth and a product according to the manufacturer's recommendations; keep chain lube far away from the caliper. Check if the disc is not rubbing throughout the rotation, and if the pads still have an even layer of friction material. Squealing after a wet ride may disappear after drying, but persistent noise, weak power, or a glassy appearance of the pads suggest contamination or wear. Leave hydraulic bleeding and fluid replacement to a service shop if you don't have the proper tools and procedure.
For rim brakes, remove embedded particles from the pads and inspect the rim wear indicator, if present. The braking surface must be clean, and the pad should hit the rim, not the tire. A wet rim extends reaction time, so after starting in the rain, safely test braking at low speed. A cable with frayed wires, a seized housing, or a arm that doesn't return qualifies for repair before the next ride.
Tires and pressure
In autumn, grip is built by tire condition and reasonable pressure, not just deep tread. Check the sidewalls for cracks, the bead at the rim, the central part for flattening, and the surface against the light. Remove small pieces of glass before they penetrate deeper. In a tubeless system, check the sealant level according to its instructions and the condition of the tape. If a repair plug was an emergency solution, assess at home whether the tire requires a permanent repair from the inside or replacement.
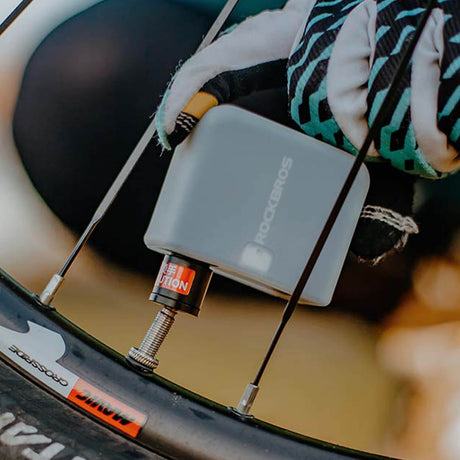
Do not automatically lower tire pressure by a fixed percentage just because autumn has begun. Too high pressure limits tire contact with uneven surfaces, but too low increases the risk of pinch flats, rim damage, and instability. Make small adjustments, record the results, and do not go below the tire and rim limits. At home, a pump with a clear gauge is convenient; on the road, simplicity matters. The ROCKBROS Classic 130 PSI mini pump supports Presta and Schrader valves, but a pressure gauge is still worthwhile for repeatable settings in the workshop.
| Ride type | Most common autumn problem | Pre-ride check | After return |
|---|---|---|---|
| City | Dirty rim, loose accessories, wet drivetrain | Brakes, lights, pressure, mounts | Drying and wiping the chain |
| Gravel | Sand in drivetrain, minor tire cuts | Tires, repair kit, gears | Cleaning derailleur pulleys and downtube |
| MTB | Mud on pads, seals, and suspension | Pads, axles, pressure, play | Gentle cleaning and drying of stanchions |
| Road | Small grip margin and punctures | Tire surface, pressure, rims | Removing glass and checking tread |
| Family recreation | Underinflated tires, loose accessories | Each bike's brakes, helmets, route | Joint quick damage inspection |
Mudguards, luggage, and emergency kit: protection tailored to the problem
A mudguard doesn't replace cleaning, but it limits the amount of water reaching your back, drivetrain, and the person riding behind you. For city and trekking bikes, the longest models possible, with good wheel coverage, provide the most protection. For MTBs, ground clearance for mud and stable mounting might be more important. Before purchasing, measure the wheel diameter, tire width, space under the fork crown and at the seatpost, and check for interference with cables. Versatility means a range of compatibility, not a guarantee of fitting every frame.
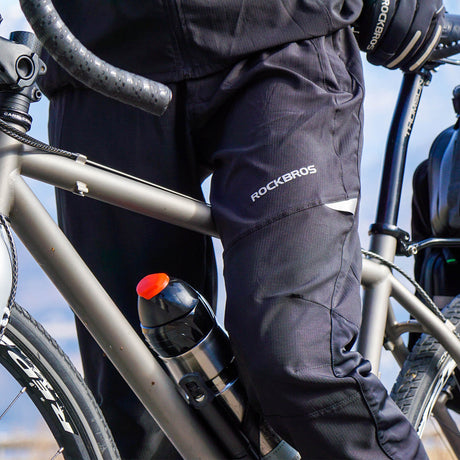
For 24–28 inch bikes, one option is the ROCKBROS mudguard set with splash guard. In practice, angle adjustment and stable mounting are key here, so compare your seatpost and fork diameter with the specifications before ordering. After installation, spin the wheel, compress the fork if it's suspended, and perform a test ride. The mudguard must not rub against the tire or shift when hitting bumps.
Build your emergency kit around problems you can fix. The minimum for a tubed tire is the correct tube, tire levers, pump, and a way to find the cause of the puncture. For tubeless, add plugs compatible with the tire, a small amount of sealant for longer rides, and an emergency tube. A multitool makes sense if it includes bits for axles, stem, seat clamp, and used accessories. A chain quick link must match the number of speeds. Plus disposable gloves, a small cloth, and a banknote or patch for emergency sidewall support.
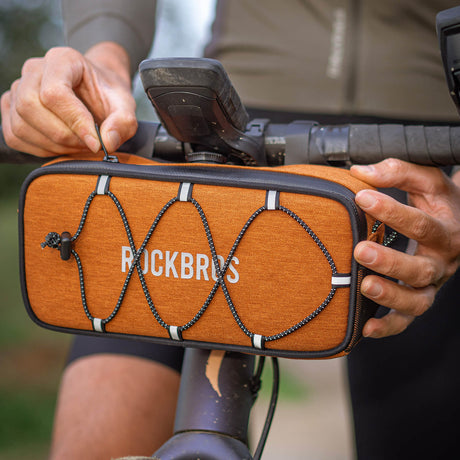
Place heavier items low and so they don't bounce. Tools should not hit the spare tube or light battery. Mount the bag, shake it, and check that the straps don't touch the tire. If you carry a kit on a rack, a solution that can be switched between bike and walking might be convenient. The new ROCKBROS A41 3-in-1 10.5L rack bag in the public store collection can hold tools and a layer of clothing, but it doesn't replace a dry bag for electronics, and its mounting needs to be chosen for a specific rack.
In autumn, also check your lighting, even if the main topic is mechanics. Charge the lights, clean the lenses, and adjust the front beam so you can see the road without dazzling others. The red reflector at the rear should remain visible after mounting a bag and mudguard. Current police materials indicate a white or selective yellow front light, a red rear position light and red reflector, an effective brake, and a bell as mandatory equipment. Before publishing or traveling, it's always worth checking applicable regulations at the source.
Most common mistakes during autumn bike preparation
- Lubricating a wet, dirty chain. The new layer binds sand, and the drivetrain continues to wear under the black coating.
- Washing with a strong jet. The effect is quick, but water can get under seals and wash out grease.
- Tightening without torque values. "Tighter" doesn't mean safer, especially with lightweight components.
- Spraying preparations near brakes. Even invisible mist can contaminate the disc and pads.
- Randomly lowering tire pressure. The setting must account for the tire, rim, weight, and surface.
- Buying a tool without comparing tips. A multitool is only useful if it fits the screws on a given bike.
- Storing a wet bike under a sealed cover. Trapped moisture promotes corrosion instead of protecting the equipment.
The common denominator of these errors is acting without diagnosis. Autumn service is not about using the most preparations, but about cleanliness, control, and repeatability. Record pressure, observe pad wear rate, and photograph component settings before disassembly. This way, the next inspection will take less time, and changes will be visible. If you cannot distinguish a natural sound from a symptom of failure, a short consultation with a service shop is better than replacing working parts by trial and error.
Autumn bike service in 45 minutes: order without chaos
- 0–5 minutes: diagnosis. Inspect tires, frame, axles, brakes, and mounts. Note symptoms before cleaning anything.
- 5–15 minutes: initial cleaning. Remove mud with a small amount of water, working from clean areas to dirty ones. Keep drivetrain brush separate.
- 15–25 minutes: drivetrain. Clean chain, cassette, and derailleur pulleys. Dry and assess wear before applying lubricant.
- 25–33 minutes: wheels and brakes. Inspect tire tread, check pressure, pads, rotors or rims, and wheel rotation.
This plan is a user check, not a full workshop overhaul. If the bike has been heavily used throughout the summer, add chain measurement, bearing inspection, wheel truing, and brake fluid assessment by someone with the right tools. Suspension forks and dropper posts have their own service intervals; mud does not indefinitely postpone them, but it may justify an earlier seal inspection. The manufacturer's manual takes precedence over a universal checklist.
Pre-ride check
After a full preparation, a daily check can take two minutes. Squeeze the levers, check axle closure, press the tires, turn on the lights, and slightly lift the bike to listen for any loose parts. Check that your bag isn't obstructing the reflector. After starting, brake at low speed and shift a few gears. This routine is especially valuable after the bike has been parked in a public place or transported by car, train, or on a rack.
Check after a wet ride
You don't need to perform the entire service again. Wipe water off the chain and fork stanchions, remove leaves from around the brakes, check the tire for glass, and let bags dry open. If the drivetrain is still clean, drying is sufficient; if you feel gritty residue, plan a cleaning before the next ride. Position the bike so that water does not accumulate in bags and covers. Do not permanently leave wet gloves or inner tubes in a closed pannier.
When to stop DIY service and take your bike to a specialist
Home inspection ends where an error could damage a part or worsen braking. Take it for service if the frame or fork has a crack, a wheel has significant play, the rim is visibly warped, a hydraulic brake is leaking, the lever pulls to the handlebar despite adjustment, or a bearing is seizing or grinding. The same applies to a thread that doesn't hold torque, and a carbon component with a deep scratch after an impact. Do not test such a bike under load.
It's also worth scheduling a visit if a symptom recurs after a correct basic adjustment. Constant chain skipping might indicate a worn cassette or a bent derailleur hanger; a rotor rubbing after every harder brake might require checking mountings and pistons. Describe precisely when the problem occurs, on which gear, after what weather, and under what load. A mechanic will find the cause faster than with a general "something is clunking." A clean, but not freshly greased-over bike also aids diagnosis.
Upon pick-up, ask for information on what was replaced and the recommended date for the next inspection. Keep torque values, pad type, tube size, and hanger model noted on your phone. This is a specific advantage during breakdowns and subsequent purchases. A well-prepared autumn bike is not one adorned with every available accessory. It is clean where friction matters, has working brakes and tires, carries a suitable repair kit, and provides the rider with predictable response.
FAQ: preparing your bike for autumn
How often should I clean my chain in autumn?
There isn't one mileage for every bike. After a wet or muddy ride, inspect, dry, and wipe down the drivetrain immediately. Perform a full cleaning when gritty residue remains, operation becomes noisy, or the lubricant's instructions require it. The condition of the drivetrain is more important than the calendar.
Can I wash my bike with a pressure washer?
A strong stream can force water under seals and wash out grease from bearings. It's safer to use a gentle flow of water, a soft brush, and rags, avoiding direct spraying of water on hubs, bottom bracket, headset, suspension fork, and e-bike connections.
What chain lubricant should I choose for wet conditions?
Wet lube usually handles moisture better but collects dirt more easily. Apply it to a clean, dry chain, allow it to set according to instructions, and thoroughly wipe off excess from the plates. Do not mix different systems, especially oil and wax, without preparation.
Do I need to lower tire pressure in autumn?
Not automatically. Start with the manufacturer's recommended range for the tire and rim, then consider rider weight, tire width, surface, and whether it's tubed or tubeless. Adjust in small increments. Too low pressure increases the risk of pinch flats and worsens stability.
What should be in an autumn repair kit?
Items tailored to your bike: an inner tube or tubeless repair kit, tire levers, pump, multi-tool with appropriate bits, compatible chain quick link, gloves, and a small rag. It's worth testing the kit once at home, rather than opening it for the first time by the roadside.
Do fenders fit every bike?
No. You need to check the wheel diameter, tire width, frame and fork clearance, mounting method, and potential interference with cables. After installation, spin the wheel and perform a test ride to ensure the fender remains stable.
When should a bike go to a professional service?
When there's a crack, significant bearing play, hydraulic leak, ineffective braking, a heavily warped wheel, damaged thread, or a problem that recurs despite correct basic adjustment. In case of safety doubts, do not perform a loaded test ride.
Summary: performance first, accessories later
The best autumn inspection is simple to repeat. First diagnosis, then gentle washing and drying, followed by drivetrain, brakes, wheels, tire pressure, and connections. Only then choose fenders, bags, and tools according to actual needs. This ensures that a purchase solves a specific problem, rather than diverting attention from a worn tire or weak brake. Dedicate 45 minutes before your next week of riding, record the results, and return to the two-minute pre-ride check. Autumn then becomes another part of the season, not a series of unforeseen malfunctions.